PHP8安装(centos7环境)
php8的安装
centos7默认的php是5.x版本的太老了,需要安装新的版本,php的安装如果想更全面的了解那还是编译安装吧,对于参数会了解。自己以前也测试编译过一些版本,不过好多都忘了
手动安装很繁琐,需要的以来很多,并且安装某个模块也很费劲,不过可以很自由的定义
extension=openssl.so 这种模块,格局开发需要可能安装很多模块,这是我常用的模块。
下面为常用的模块
amqp.so grpc.so opcache.a opcache.so phalcon.so protobuf.so redis.so seaslog.so swoole.so xlswriter.so
编译安装可以尽量多的安装模块。
安装的时候问题很多,如果看模块支持问题多看./configure --help查看他支持的模块
一、事先安装的模块
yum install -y bzip2-devel libcurl-devel libxml2-devel sqlite-devel oniguruma oniguruma-devel libxml2 libxml2-devel bzip2 bzip2-devel libcurl libcurl-devel libjpeg libjpeg-devel zstd libzstd-devel curl libcurl-devel libpng libpng-devel
二、安装PHP
1.下载PHP官方包
https://www.php.net
官网中,查看安装包链接,选择上方“download”, Current Stable PHP 8。
wget https://www.php.net/distributions/php-8.2.3.tar.gz
tar -xzxvf php-8.2.3.tar.gz
下载历史版本
https://www.php.net/downloads.php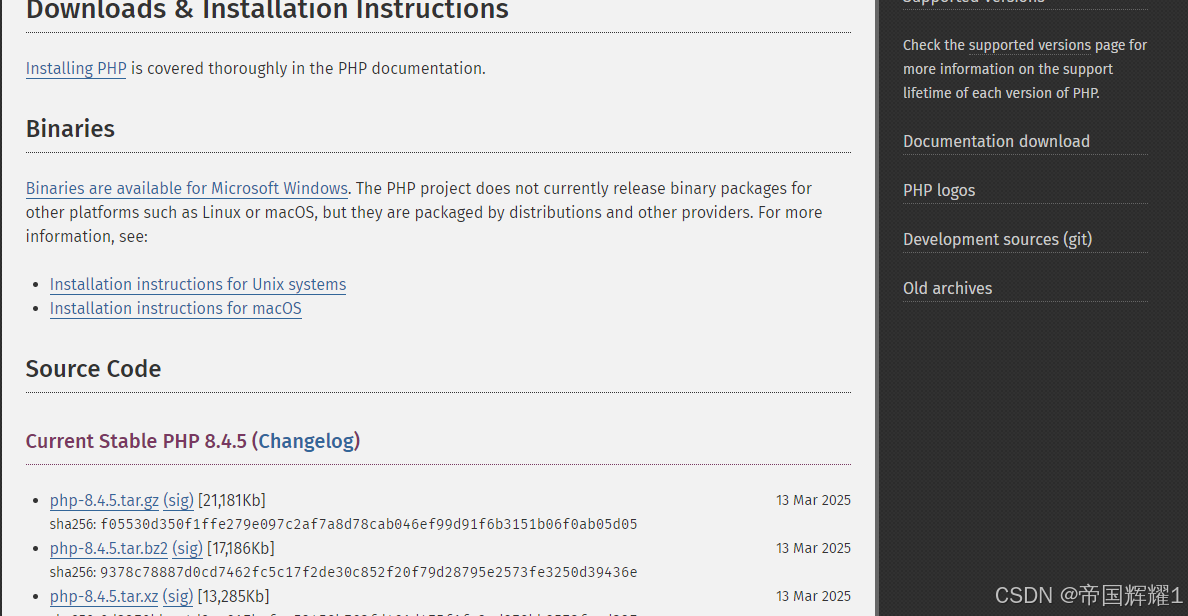
2.设置编译需要加载的模块
mkdir php-8.2.3
cd php-8.2.3
./configure --prefix=/usr/local/php --enable-fpm --with-mysqli --enable-mbstring --with-bz2 --with-curl --enable-gd --with-zip --with-zlib --with-openssl
我的选择with-openssl未安装出错
./configure --prefix=/usr/local/php
–with-config-file-path=/usr/local/php/etc
–enable-inline-optimization
–disable-debug
–disable-rpath
–enable-shared
–enable-opcache
–enable-fpm
–enable-mysqlnd
–with-fpm-user=www
–with-fpm-group=www
–with-mysql=mysqlnd
–with-mysqli=mysqlnd
–with-pdo-mysql=mysqlnd
–with-gettext
–enable-mbstring
–enable-mbregex
–with-iconv
–with-tidy
–with-mcrypt
–with-mhash
–with-xmlrpc
–enable-wddx
–enable-bcmath
–enable-intl
–enable-soap
–enable-exif
–enable-calendar
–with-libxml-dir
–enable-pcntl
–enable-shmop
–enable-sysvmsg
–enable-sysvsem
–enable-sysvshm
–enable-sockets
–enable-tokenizer
–enable-ftp
–enable-session
–with-curl
–with-zlib=/usr/local/zlib
–enable-zip
–with-bz2
–with-readline
–with-gd
–with-xsl
–enable-gd-native-tty
–enable-static
–enable-zend-multibyte
–enable-short-tags
–with-png-dir
–with-freetype-dir=/usr/local/freetype
–with-jpeg-dir=/usr/local/jpeg/lib
make -j2 # 双核服务器参数配置
make install
cd …
3.设置环境变量
#设置环境变量
touch /etc/profile.d/php.sh
chmod 777 /etc/profile.d/php.sh
echo -e ‘\nexport PATH=/usr/local/php/bin:$PATH\n’ >> /etc/profile.d/php.sh
source /etc/profile.d/php.sh
4.创建配置文件,并将其复制到正确的位置。
在源代码目录 php-8.2.3 中下执行以下命令
cd php-8.2.3
cp php.ini-development /usr/local/php/lib/php.ini
cd …
cp /usr/local/php/etc/php-fpm.conf.default /usr/local/php/etc/php-fpm.conf
cp /usr/local/php/etc/php-fpm.d/www.conf.default /usr/local/php/etc/php-fpm.d/www.conf
三、配置php-fpm服务到systemctl
1.打开php-fpm.conf
vim /usr/local/php/etc/php-fpm.conf
找到以下内容并修改
; Pid file
; Note: the default prefix is/usr/local/php/var
; Default Value: none
pid = /var/run/php-fpm.pid
include=/usr/local/php/etc/php-fpm.d/*.conf
;/usr/local/php/etc/php-fpm.d
2.新建php-fpm服务文件
vim /usr/lib/systemd/system/php-fpm.service
[Unit]
Description=The PHP FastCGI Process Manager
After=syslog.target network.target
[Service]
Type=forking
PIDFile=/var/run/php-fpm.pid
ExecStart=/usr/local/php/sbin/php-fpm
ExecReload=/bin/kill -USR2 $MAINPID
PrivateTmp=true
[Install]
WantedBy=multi-user.target
3.加载服务
systemctl start php-fpm.service
systemctl status php-fpm.service
4.配置开机启动服务
systemctl enable php-fpm.service
systemctl stop php-fpm.service
systemctl restart php-fpm.service
systemctl disable php-fpm.service
四、参考资料
在官网中,选上方“Documentation”,打开的新网页左侧“View Online”中,选择Chinese (Simplified),官方中文手册网址:https://www.php.net/manual/zh/。
1.查阅“使用 PHP-FPM 为 Nginx 1.4.x HTTP 服务器安装和配置 PHP ”的说明
PHP 手册 ->安装与配置 -> Unix 系统下的安装-> Unix 系统下的 Nginx 1.4.x
2.查阅“FPM(FastCGI 进程管理器)”的说明
PHP 手册-> 安装与配置 ->FastCGI 进程管理器(FPM)->安装
3.以启用 mysqli 扩展的方式编译 PHP
PHP 手册-> 函数参考-> 数据库扩展-> 针对各数据库系统对应的扩展-> MySQL-> Mysqli-> 安装/配置
PHP7以后,支持mysqli和PDO_MySQL两种mysql的扩展模式
五、Web测试
1.在web目录建立文件。
vim info.php
echo “<?php phpinfo(); ?>” > info.php
2.测试index.php
cp info.php index.php
六、安装openssl扩展
1.事先安装依赖程序
yum install m4 autoconf
2.复制源代码内容
rm -Rf /usr/local/php-8.2.3/include/php/ext/openssl
cp -R /root/php-8.2.3/ext/openssl /usr/local/php-8.1.9/include/php/ext/
cd /usr/local/php-8.2.3/include/php/ext/openssl
mv config0.m4 config.m4
3.编译扩展
#删除旧库
rm -f /usr/lib64/libssl.so
rm -f /usr/lib64/libssl.so.3
rm -f /usr/lib64/libcrypto.so
rm -f /usr/lib64/libcrypto.so.3
#建立1.1.1q的openssl库软连接
#ln -s /usr/local/lib64/libssl.so.1.1 /usr/lib64/libssl.so
#ln -s /usr/local/lib64/libcrypto.so.1.1 /usr/lib64/libcrypto.so
#建立3.0.5的openssl库软连接
#默认安装openssl
ln -s /usr/local/lib64/libssl.so /usr/lib64/
ln -s /usr/local/lib64/libssl.so.3 /usr/lib64/
ln -s /usr/local/lib64/libcrypto.so /usr/lib64/
ln -s /usr/local/lib64/libcrypto.so.3 /usr/lib64/
#自定义安装openssl
#ln -s /usr/local/openssl/lib64/libssl.so /usr/lib64/
#ln -s /usr/local/openssl/lib64/libssl.so.3 /usr/lib64/
#ln -s /usr/local/openssl/lib64/libcrypto.so /usr/lib64/
#ln -s /usr/local/openssl/lib64/libcrypto.so.3 /usr/lib64/
#进入模块目录
cd /usr/local/php-8.2.3/include/php/ext/openssl
#运行phpize后,将生成configure文件
/usr/local/php-8.2.3/bin/phpize
#编译
./configure --with-openssl --with-php-config=/usr/local/php-8.2.3/bin/php-config
make -j2
make install
4.修改ini文件
vim /usr/local/php-8.2.3/lib/php.ini
#;extension=openssl
extension=openssl.so
5.重启nginx服务和php-fpm服务。
编译安装【libxml2】
wget https://gitlab.gnome.org/GNOME/libxml2/-/archive/v2.9.12/libxml2-2.9.12.tar.gz
tar -xvf libxml2-2.9.12.tar.gz
cd libxml2-v2.9.12
./configure --prefix=/usr/local/libxml2/
make && make install

有“AI”的1024 = 2048,欢迎大家加入2048 AI社区
更多推荐


 24
24 0
0- 0


 已为社区贡献7条内容

所有评论(0)