配置防火墙和SELinux
systemctl命令速查
[root@client ~]# systemctl unmask firewalld
//执行命令,即可实现取消服务的锁定
[root@client ~]# systemctl mask firewalld//下次需要锁定该服务时执行
[root@client ~]# systemctl start firewalld.service//启动防火墙
[root@client ~]# systemctl stop firewalld.service//禁用防火墙
[root@client ~]# systemctl reload firewalld.service
//重载配置(需要先开启防火墙)
[root@client ~]# systemctl restart firewalld.service
//重启服务
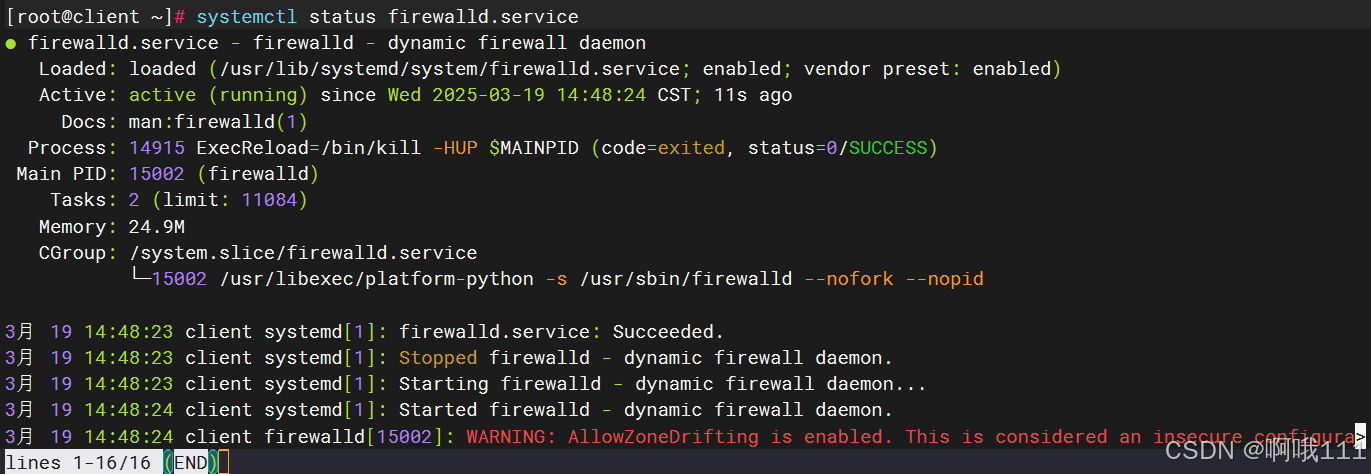
[root@client ~]# systemctl status firewalld.service//显示服务的状态
[root@client ~]# systemctl enable firewalld.service
//在开机时启用服务
[root@client ~]# systemctl disable firewalld.service
//在开机时禁用服务
[root@client ~]# systemctl is-enabled firewalld.service
//查看服务是否开机启动
[root@client ~]# systemctl list-unit-files | grep enabled//查看已启动的服务列表
[root@client ~]# systemctl --failed
//查看启动失败的服务列表
1.启动防火墙之前要先关闭

2.服务的状态
firewall-cmd命令速查
[root@client ~]# firewall-cmd --state
//查看防火墙状态
[root@client ~]# firewall-cmd --reload
//更新防火墙规则
[root@client ~]# firewall-cmd --list-ports//查看所有打开的端口
[root@client ~]# firewall-cmd --list-services
//查看所有允许的服务
[root@client ~]# firewall-cmd --get-services//获取所有支持的服务
区域相关命令速查
[root@client ~]# firewall-cmd --list-all-zones
//查看所有区域信息
[root@client ~]# firewall-cmd --get-active-zones
//查看活动区域信息
[root@client ~]# firewall-cmd --set-default-zone=public
//设置 public 为默认区域
[root@client ~]# firewall-cmd --get-default-zone
//查看默认区域信息
[root@client ~]# firewall-cmd --zone=public --add-interface=eth0//将接口 eth0 加入区域 publid
接口相关命令速查
[root@client ~]# firewall-cmd --zone=public --remove-interface=ens160
//从区域public中删除接口ens160
[root@client ~]# firewall-cmd --zone=external --change-interface=ens160
//修改接口ens160 所属区域为 default
[root@client ~]# firewall-cmd --get-zone-of-interface=ens160
//查看接口 ens160 所属区域
端口控制命令速查
[root@client ~]# firewall-cmd --add-port=80/tcp --permanent
//永久开启 80 端口(全局)
[root@client ~]# firewall-cmd --remove-port=80/tcp --permanent
//永久关闭 80 端口(全局)
[root@client ~]# firewall-cmd --add-port=65001-65010/tcp --permanent
//永久开启 65001-65010端口(全局)
[root@client ~]# firewall-cmd --zone=public --add-port=80/tcp --permanent //永久开启 80 端口(区域 public)
[root@client ~]# firewall-cmd --zone=public --remove-port=80/tcp --permanent
//永久关闭 80端口(区域 public)
[root@client ~]# firewall-cmd --zone=public --add-port=65001-65010/tcp --permanent //永久开启 65001-65010 端口(区域 public)
[root@client ~]# firewall-cmd --query-port=8080/tcp
//查询端口是否开放
[root@client ~]# firewall-cmd --permanent --add-port=80/tcp
//开放 80 端口
[root@client ~]# firewall-cmd --permanent --remove-port=8080/tcp
//移除端口
[root@client ~]# firewall-cmd --reload //重启防火墙(修改配置后要重启防火墙)
使用终端管理工具实例
1.查看firewalld服务当前状态和使用的区域
[root@client ~]# firewall-cmd --state
//查看防火墙状态
[root@client ~]# systemctl restart firewalld
[root@client ~]# firewall-cmd --get-default-zone//查看默认区域
2.查询防火墙生效ens160网卡在firewalld服务中的区域
[root@client ~]# firewall-cmd --get-active-zones
//查看当前防火墙中生效的区域
[root@client ~]# firewall-cmd --set-default-zone=trusted
//设定默认区域
3.把firewalld服务中ens160网卡默认区域修改为external,并在系统重启后生效。分别查看运行时模式与永久模式下的区域名称
[root@client ~]# firewall-cmd --list-all --zone=work
//查看指定区域的防火墙策略
[root@client ~]# firewall-cmd --permanent --zone=external --change-interface=ens160
[root@client ~]# firewall-cmd --get-zone-of-interface=ens160
[root@client ~]# firewall-cmd --permanent --get-zone-of-interface=ens160
4.把firewalld服务的当前默认区域设置为public
[root@client ~]# firewall-cmd --set-default-zone=public
[root@client ~]# firewall-cmd --get-default-zone
5.启动/关闭firewalld服务的应急状况模式,阻断一切网络连接
[root@client ~]# firewall-cmd --panic-on
[root@client ~]# firewall-cmd --panic-off
6.查询public区域是否允许请求SSH和HTTPS的流量
[root@client ~]# firewall-cmd --zone=public --query-service=ssh
[root@client ~]# firewall-cmd --zone=public --query-service=https
7.把firewalld服务中请求https的流量设置为永久允许,并立即生效
[root@client ~]# firewall-cmd --get-services
//查看所有可以设定的服务
[root@client ~]# firewall-cmd --zone=public --add-service=https
[root@client ~]# firewall-cmd --permanent --zone=public --add-service=https
[root@client ~]# firewall-cmd --reload
[root@client ~]# firewall-cmd --list-all//查看生效的防火墙策略
8.把firewalld服务中请求https的流量设置为永久拒绝,并立即生效
[root@client ~]# firewall-cmd --permanent --zone=public --remove-service=https
[root@client ~]# firewall-cmd --reload
[root@client ~]# firewall-cmd --list-all//查看生效的防火墙策略
9.把在firewalld服务中访问8088和8089端口的流量策略设置为允许,但仅限当前生效
[root@client ~]# firewall-cmd --zone=public --add-port=8088-8089/tcp
[root@client ~]# firewall-cmd --zone=public --list-ports
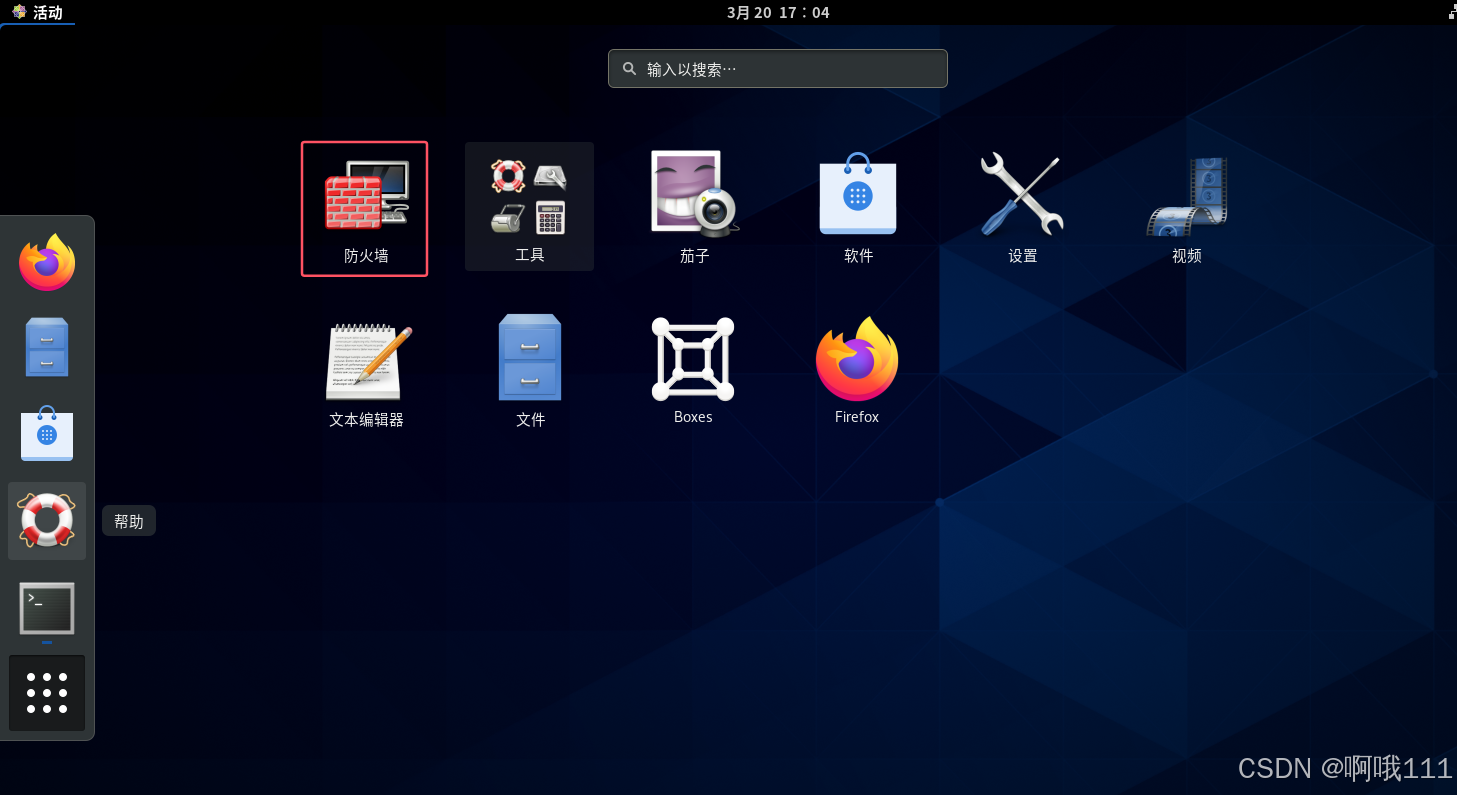
图像化的配置
先配置yum仓库
[root@server ~]#cd /etc/yum.repos.d/
[root@server ~]#rm -f *
[root@server ~]#curl -o /etc/yum.repos.d/CentOS-Base.repo https://mirrors.aliyun.com/repo/Centos-vault-8.5.2111.repo
[root@server ~]#sed -i -e '/mirrors.cloud.aliyuncs.com/d' -e '/mirrors.aliyuncs.com/d' /etc/yum.repos.d/CentOS-Base.repo
[root@server ~]# mount /dev/cdrom /media/
[root@server ~]# dnf install firewall-config -y
设置SELinux的模式
使用配置文件设置SELinux的模式
[root@client ~]# cat /etc/selinux/config -n

使用命令行命令设置SELinux的模式
[root@client ~]# getenforce
//检查当前SELinux的运行状态
[root@client ~]# setenforce permissive
//切换到宽容模式(Permissive)
[root@client ~]# setenforce 1
//1代表强制模式(Enforcing)
[root@client ~]# setenforce 0
//0代表宽容模式(Permissive)
[root@client ~]# sestatus
//查看SELinux的运行状态

查看用户、文件和进程的安全上下文
Z都是大写!!!
[root@client ~]# id -Z
//查看用户的安全上下文
[root@client ~]# ls -Zl//查看文件的安全上下文
[root@client ~]# ps -Z
//查看进程的安全上下文
NAT
配置SNAT(静态NAT)并测试
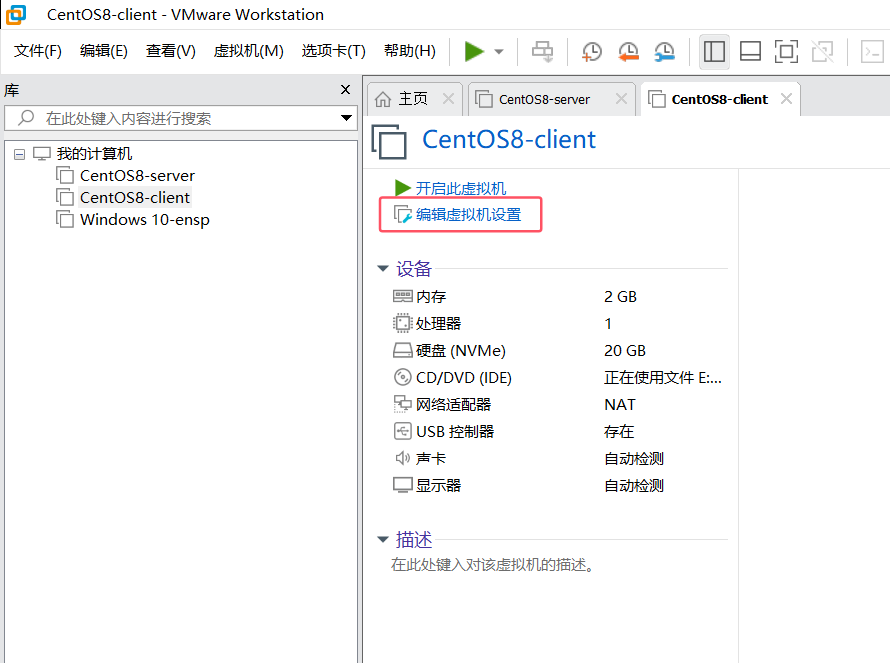
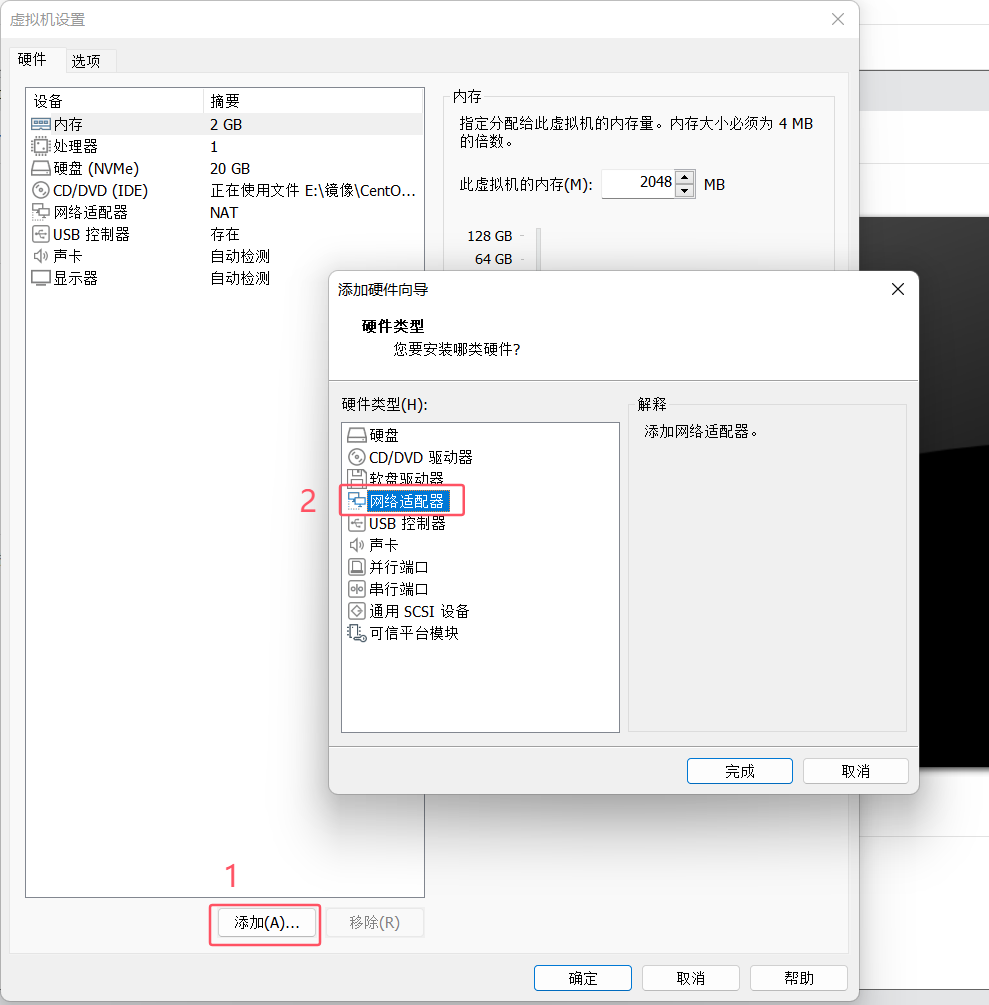
在client上安装双网卡
在关机状态下,添加网卡:第一块连接VM1(仅主机),第二块连接VM8(NAT)
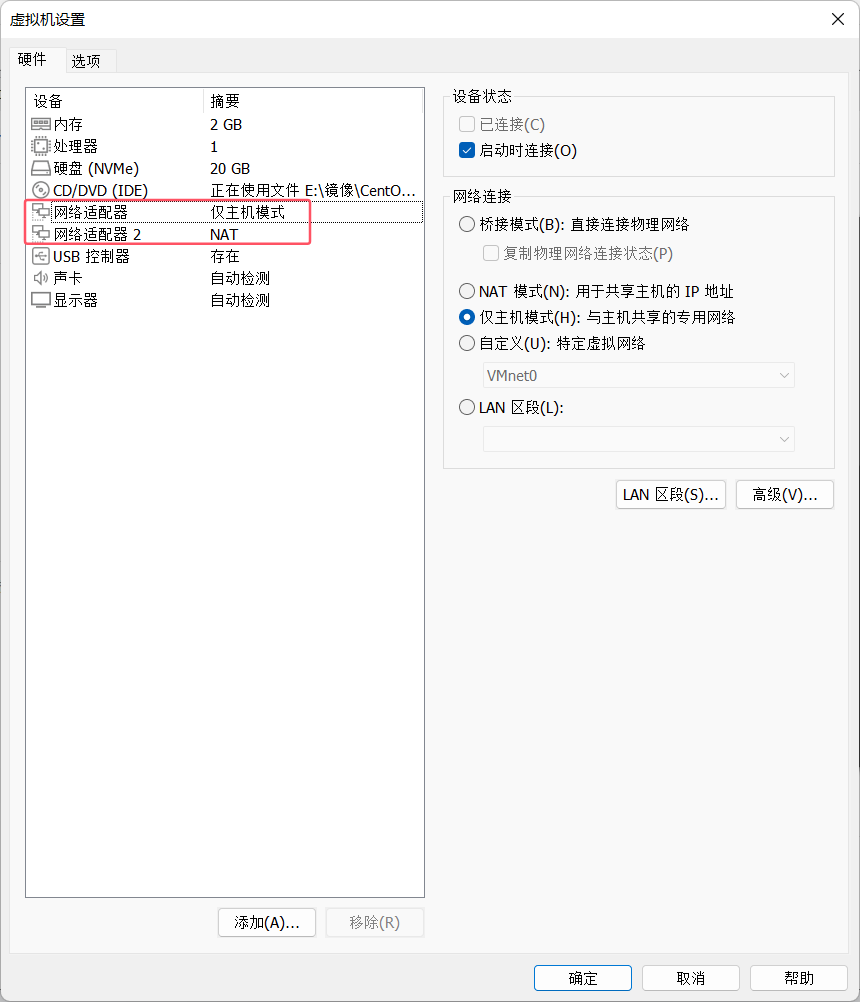
开机使用root用户登录
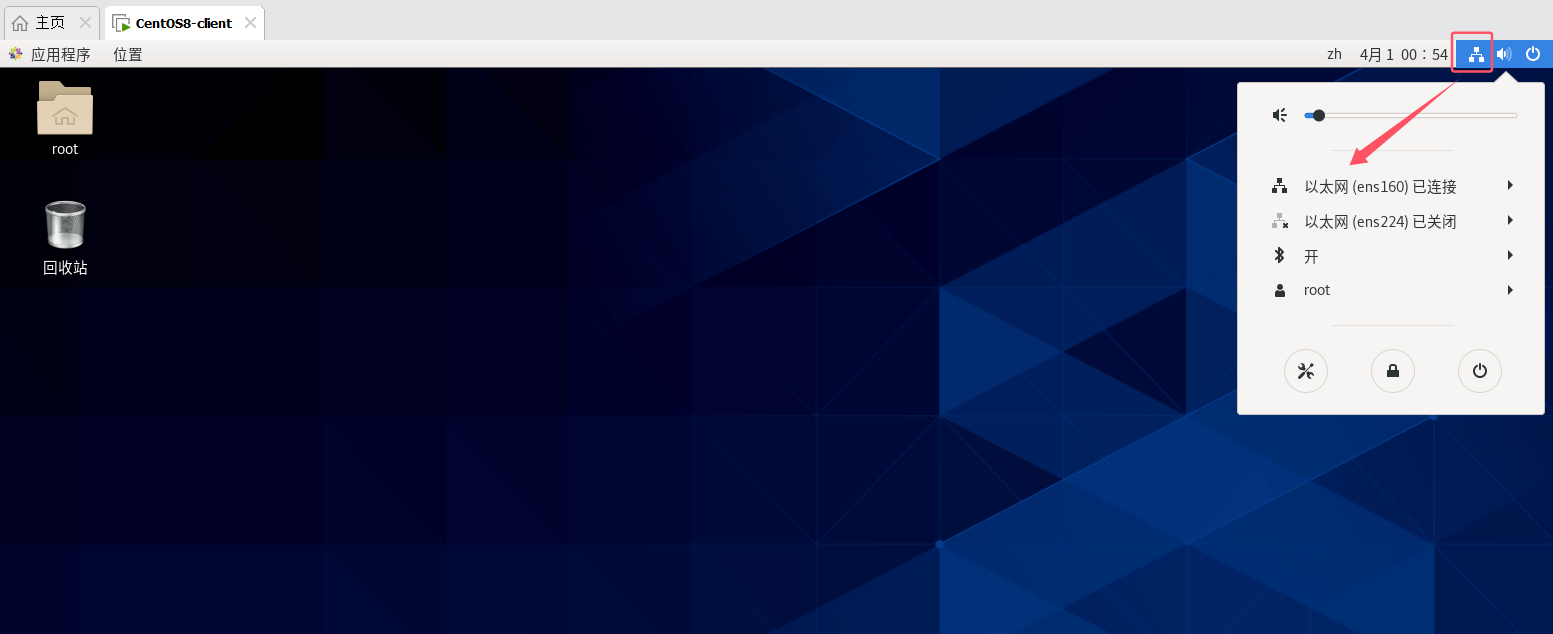
因为网卡1是仅主机模式,网卡2是NAT模式。
给网卡1配置和VMnet1网段的IP地址,网卡2配置和VMne8网段的IP地址
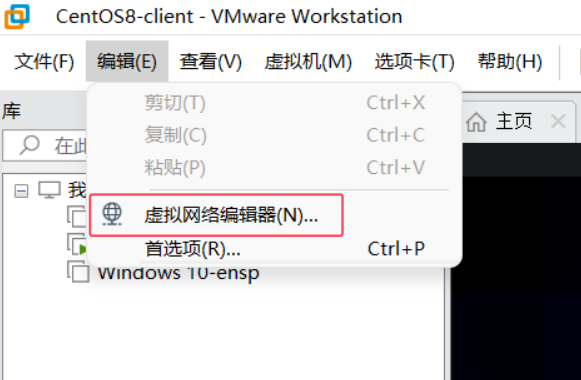
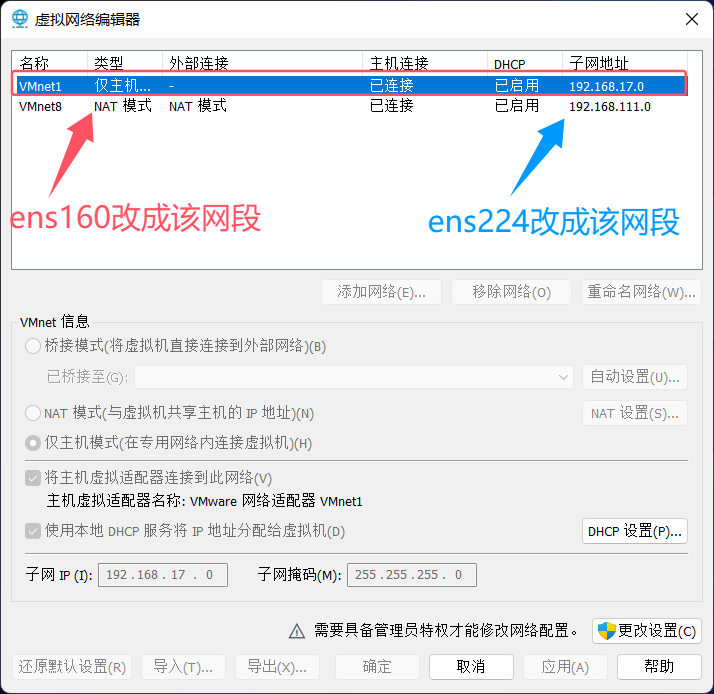
本次使用server1和client1两台虚拟机演示
将server1的ens160IP地址设置为192.168.17.10;ens224IP地址设置为192.168.111.10。
将client1的ens160IP地址设置为192.168.17.20;ens224IP地址设置为192.168.111.20。
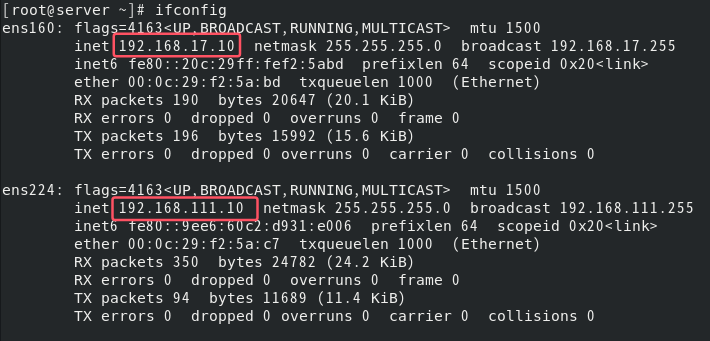
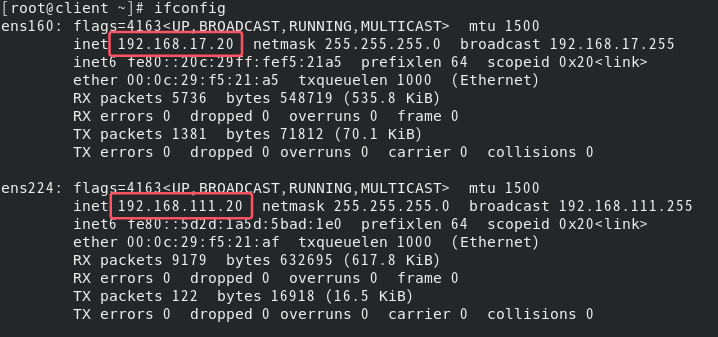
测试两台设备的连通性
-c:ping包的个数
-I:带源ping
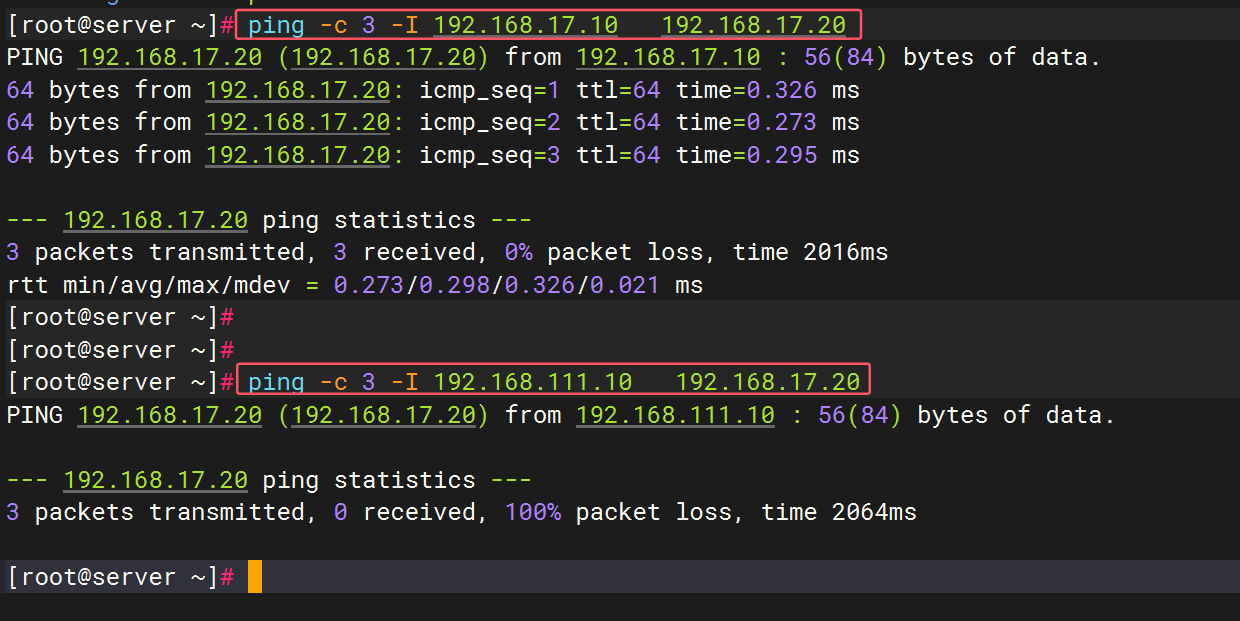
可以看到server01用VM1的IP地址去ping client的VM1地址能通,用VM8地址不能通
在client上开启转发功能
[root@client ~]# cat /proc/sys/net/ipv4/ip_forward
1//查看IPv4转发状态
[root@client ~]# echo 1 > /proc/sys/net/ipv4/ip_forward
//启用IPv4转发
在client上将接口ens224加入外网区域external
[root@client ~]# firewall-cmd --get-zone-of-interface=ens224
public//查看接口所属的防火墙区域
[root@client ~]# firewall-cmd --permanent --zone=external --change-interface=ens224
The interface is under control of NetworkManager, setting zone to 'external'.
success//永久修改接口的防火墙区域
[root@client ~]# firewall-cmd --zone=external --list-all//查看指定区域的详细配置
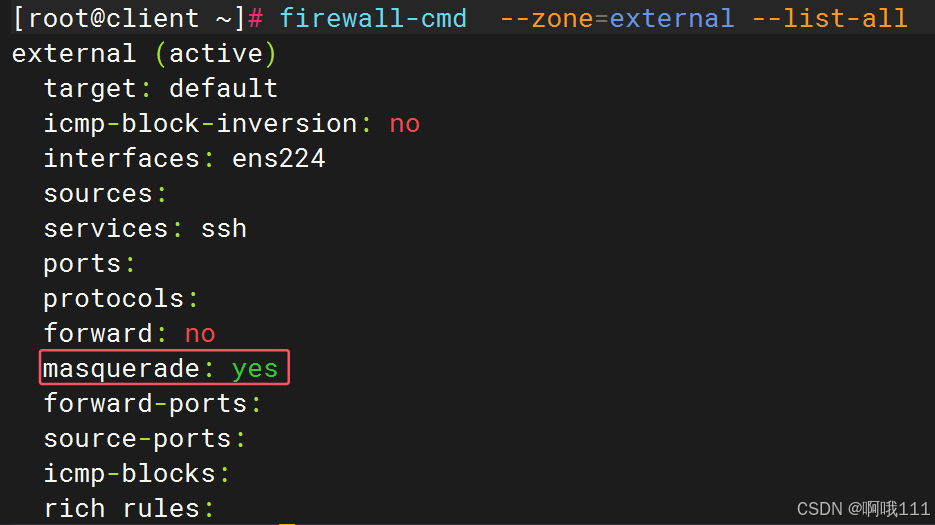
由于需要NAT连接网络,所以将外网区域的伪装打开
上图中已经打开,可以忽略
[root@client ~]# firewall-cmd --permanent --zone=external --add-masquerade
//为 external 区域永久启用IP伪装(MASQUERADE)
[root@client ~]# firewall-cmd --reload//重新加载防火墙规则
[root@client ~]# firewall-cmd --permanent --zone=external --query-masquerade
//检查 external 区域是否永久启用了IP伪装
[root@client ~]# firewall-cmd --zone=external --list-all
//查看 external 区域的当前配置
在client上配置内部接口ens160
[root@client ~]# firewall-cmd --get-zone-of-interface=ens160
public//查看接口 ens160 所属的防火墙区域
[root@client ~]# firewall-cmd --permanent --zone=internal --change-interface=ens160
The interface is under control of NetworkManager, setting zone to 'internal'.
success//永久将接口 ens160 绑定到 internal 区域
[root@client ~]# firewall-cmd --reload
success//重新加载防火墙配置
[root@client ~]# firewall-cmd --zone=internal --list-all//查看 internal 区域的详细配置

有“AI”的1024 = 2048,欢迎大家加入2048 AI社区
更多推荐


 13
13 0
0- 0


 已为社区贡献3条内容

所有评论(0)