vue3项目(八)---购物车
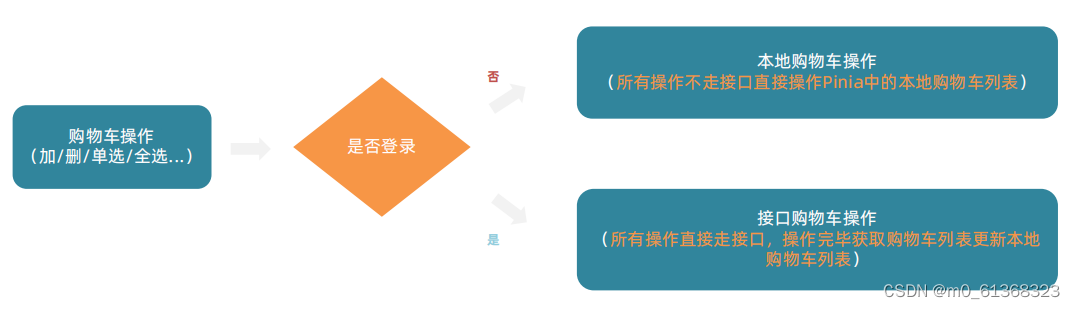
1.购物车业务逻辑梳理拆解1.购物车业务逻辑梳理拆解1. 整个购物车的实现分为俩个大分支,本地购物车操作和接口购物车操作2. 由于购物车数据的特殊性,采取Pinia管理购物车列表数据并添加持久化缓存2.本地购物车 - 加入购物车实现1)封装cartStore在stroes里新建cartStore.js,用于封装购物车模块2)组件点击添加按钮给购物车绑定添加事件定义添加购物车事件3)调用action
1.购物车业务逻辑梳理拆解
2.本地购物车 - 加入购物车实现
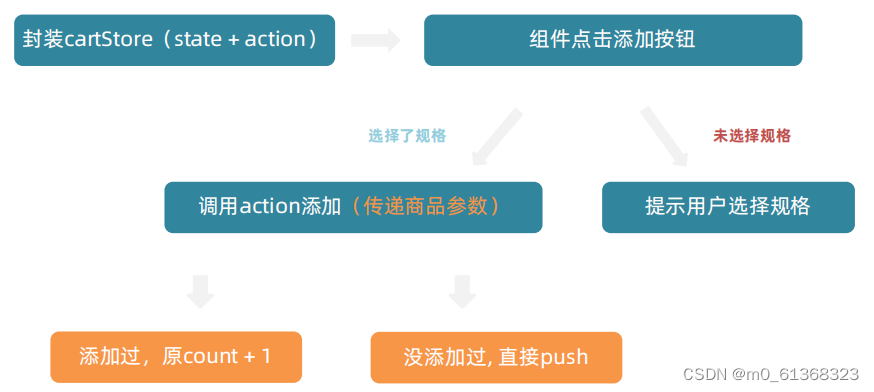
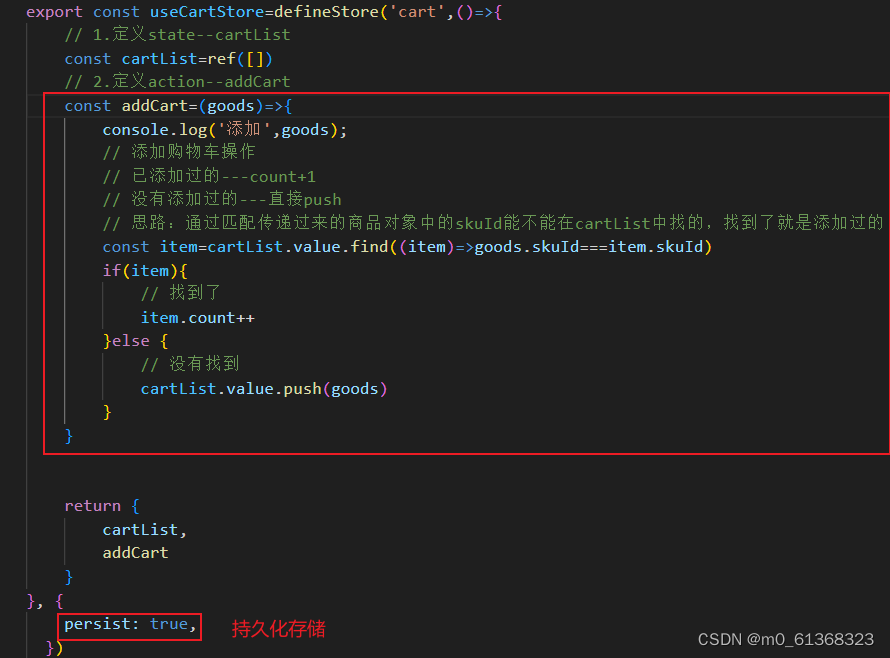
1)封装cartStore
在stroes里新建cartStore.js,用于封装购物车模块
// 封装购物车模块

import {defineStore} from 'pinia'
import {ref} from 'vue'

export const useCartStore=defineStore('cart',()=>{
    // 1.定义state--cartList
    const cartList=ref([])
    // 2.定义action--addCart
    const addCart=()=>{
    // 添加购物车操作
    }
    return {
        cartList,
        addCart
    }
} )
2)组件点击添加按钮
给购物车绑定添加事件
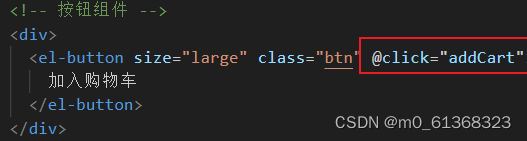
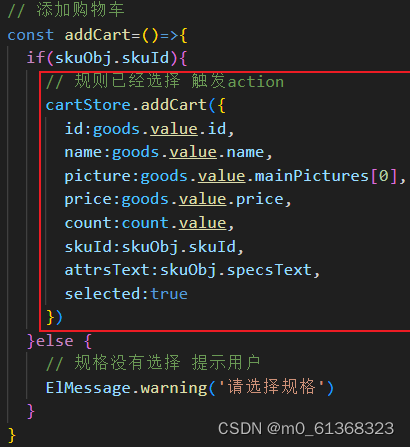
定义添加购物车事件
const addCart=()=>{
if(skuObj.skuId){
//规则已经选择 触发action

else {
//规则还没有选择 提示用户
ElMessage.warning('请选择规格')
}
}
3)调用action添加(传递参数)
准备参数
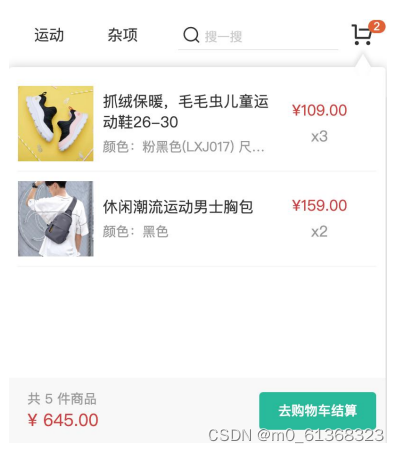
3.本地购物车 - 头部购物车列表渲染
准备头部购物车组件--->从pinia中获取数据,渲染列表
1)在Layout/components下新建HeaderCart组件,用于存储头部购物车
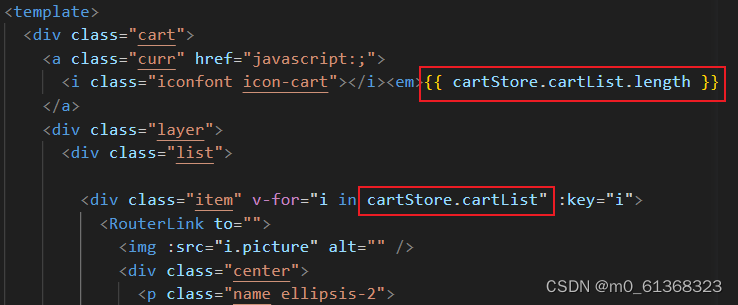
2)获取数据
<script setup>
import {useCartStore} from '@/stores/cartStore'
const cartStore=useCartStore()
</script>
渲染列表
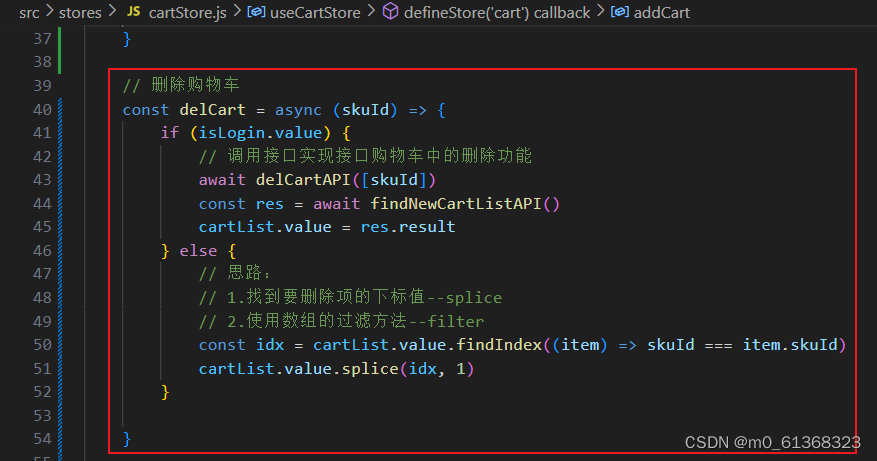
4.本地购物车 - 头部购物车删除实现
通过获取商品的id,来实现删除功能
1)编写删除的action函数
//src/stores/cartStore.js
export const useCartStore=defineStore('cart',()=>{

//删除购物车
const delCart=(skuId)=>{
const idx=cartList.value.findIndex((item)=>skuId===item.skuId)
cartList.value.splice(idx,1)

return {
delCart
}

}
2)在组件中实现删除
![]()
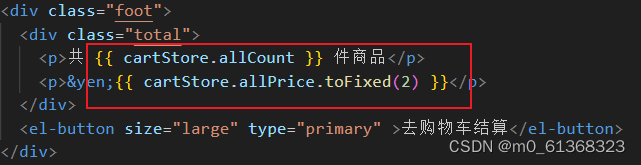
5.本地购物车 - 头部购物车统计计算
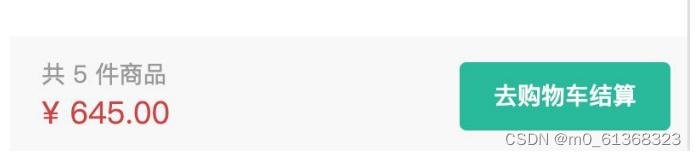
使用计算属性来实现:
//src/stores/cartStore.js

export const useCartStore=defineStore('cart',()=>{

//计算属性
//1.总的数量 所有项的count之和
const allCount=computed(()=>{carList.value.reduce((a,c)=>a+c.count,0)})
// 2.总价 所有项的count*price之和
const allPrice=computed(()=>cartList.value.reduce((a,c)=>a+c.count*c.price,0))

return {allCount,allPrice}

}
6.本地购物车-列表购物车
列表购物车-基础内容渲染
准备模板-->绑定路由-->渲染基础列表
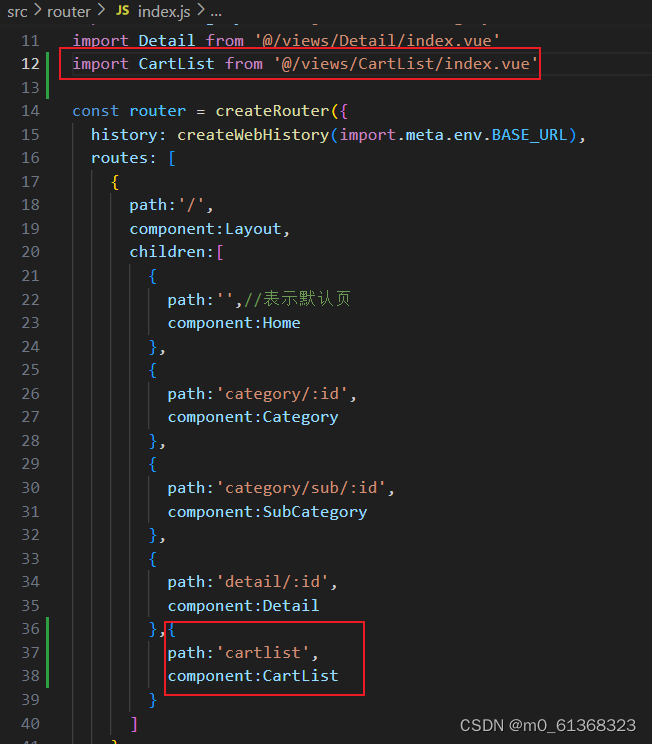
1)在views下新建CartList文件,用于列表购物车页面
2)绑定路由
3)获取数据
//src/views/CartList/index.vue

<script setup>
import {useCartStore} from '@/stores/cartStore'
const cartStore=useCartStore()
</script>
4)渲染列表
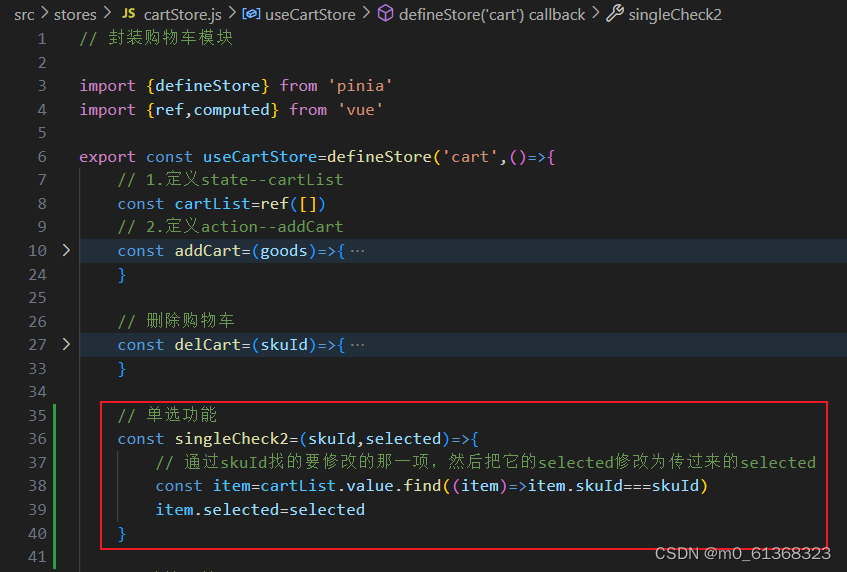
列表购物车-单选功能
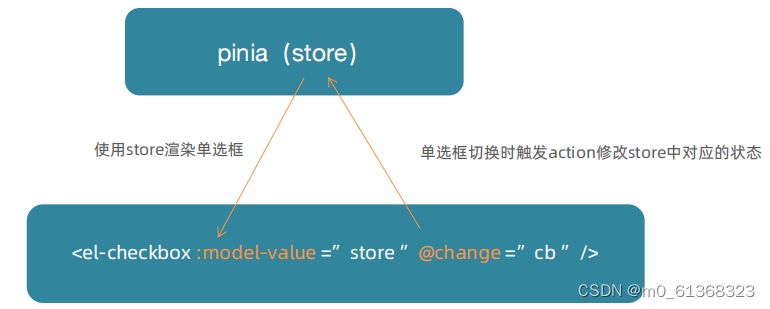
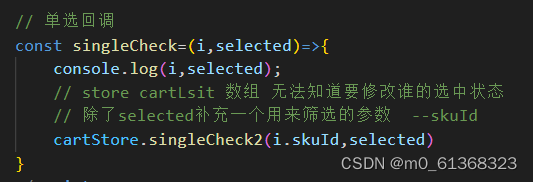
1) 给单选框绑定事件,并把当前选的商品的id传过去。
![]()
2)定义单选功能
3)使用单选功能
列表购物车-全选功能
//src/stores/cartStroe.js
const isAll=computed(()=>cartList.value.every((item)=>item.selected))


//src/views/CartList/index.vue
//给全选框绑定isAll

<el-checkbox  :model-value="cartStore.isAll"  />
2)全选决定单选
//src/stores/cartStroe.js

//全选功能
const allCheck2=(selected)=>{
    //把cartList中的每一项的selected都设置为当前全选框的状态
    cartList.value.forEach(item=>item.selected=selected)
}


//src/views/CartList/index.vue
//给全选框绑定点击事件
<el-checkbox :model-value="cartStore.isAll" @change="allCheck"/>

//全选回调
const allCheck=(selected)=>{
    cartStore.allCheck2(selected)
}
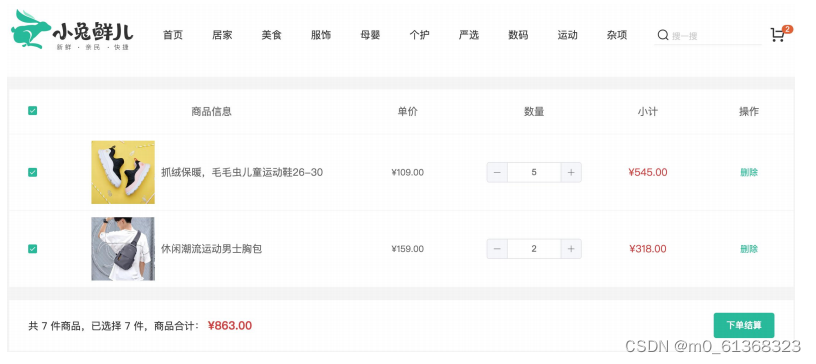
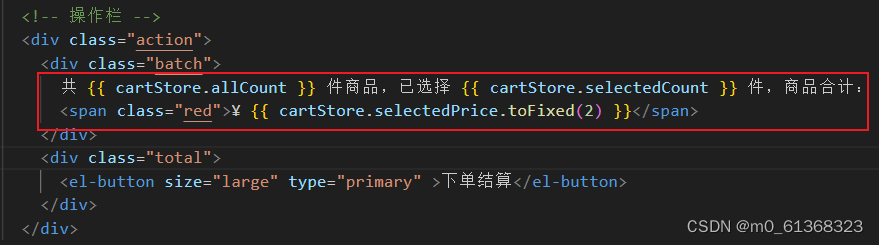
列表购物车-统计数据功能
//src/stores/cartStroe.js


//已选择的数量
const selectedCount=computed(()=>
carList.value
.filter(item=>item.selected)
.reduce((a,c)=>a+c.count,0)
)

//已选择商品价格合计
const selectedPrice=computed(()=>
carList.value
.filter(item=>item.selected)
.reduce((a,c)=>a+c.count*c.price,0)
)
2)渲染数据
7.接口购物车
接口购物车-加入购物车
到目前为止,购物车在非登录状态下的各种操作都已经ok了,包括action的封装、触发、参数传递,剩下的事情就是在action中做登录状态的分支判断,补充登录状态下的接口操作逻辑即可
 通过token来判断是否登录
目前,token在useUserStore中,通过引入,获取token
//src/stores/cateStore.js
import { useUserStore } from './user'
//引入接口函数
import { insertCartAPI,findNewCartListAPI } from '@/apis/cart'

export const useCartStore = defineStore('cart', () => {

    const userStore = useUserStore()
    const isLogin = computed(() => userStore.userInfo.token)

//加入购物车
const addCart =async (goods) => {

        const{skuId,count}=goods
        if (isLogin.value) {
            // 登录之后的加入购物车逻辑
          await  insertCartAPI({skuId,count})
          const res=await findNewCartListAPI()
          cartList.value=res.result

        }else{
        ...........
            }
    }

}
封装接口
//src/apis/cart.js
// 封装购物车相关接口
import request from "@/utils/http";

// 加入购物车
export const insertCartAPI = ({ skuId, count }) => {
    return request({
      url: '/member/cart',
      method: 'POST',
      data: {
        skuId,
        count
      }
    })
  }

// 获取购物车列表
export const findNewCartListAPI=()=>{
    return request({
        url:'/member/cart'
    })
}
接口购物车-删除购物车

和加入购物车步骤一样
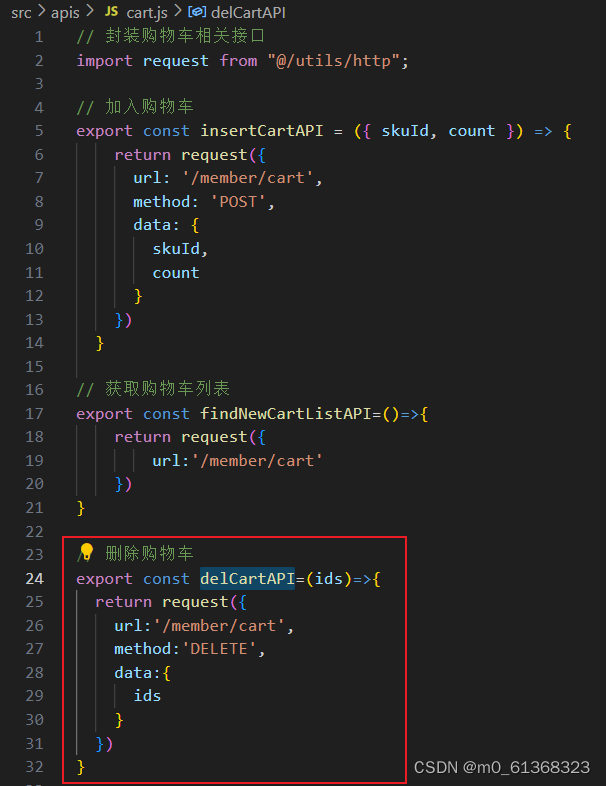
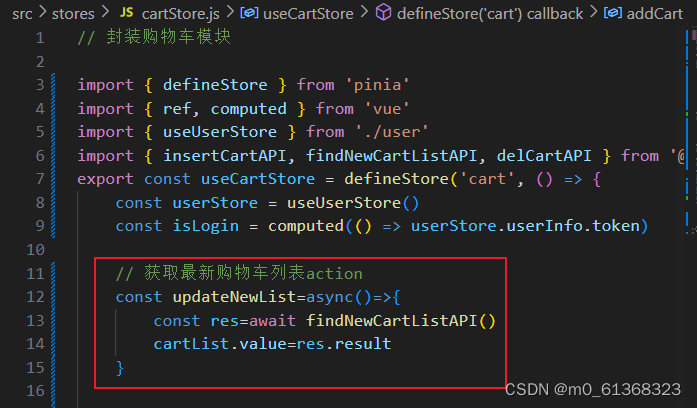
由于会在多个地方获取最新的购物车列表,所以把获取最新购物车列表封装为一个函数,直接调用函数使用。
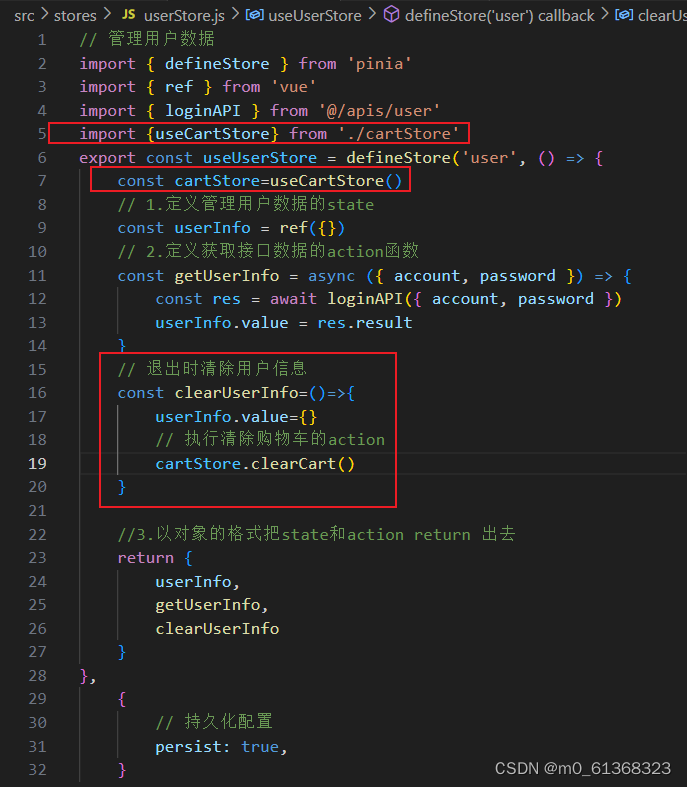
8.退出登录-清空购物车列表
在用户退出登录时,除了清除用户信息之外,也需要把购物车数据清空

1)补充清除购物车的action
//src/stores/cartStore.js

...

// 清除购物车
    const clearCart=()=>{
        cartList.value=[]
    }

.....
2)执行清除功能
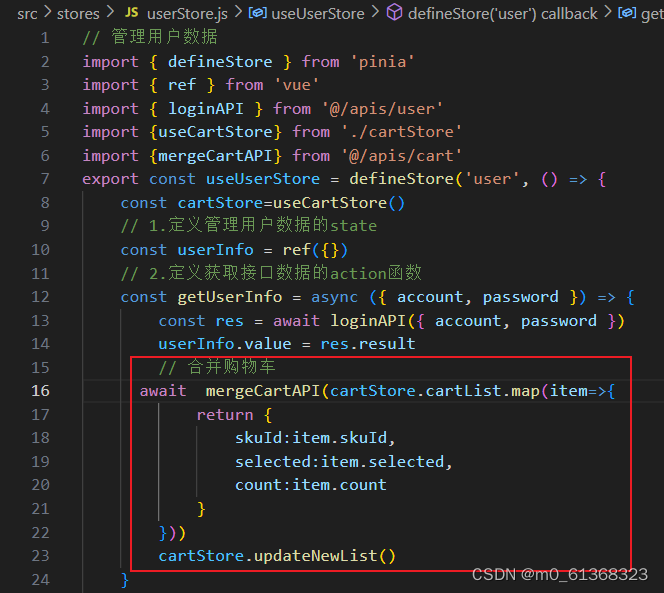
9.合并本地购物车到服务器
需求:把当用户没有登录时,所做的所有购物车操作 与 当用户登录时的购物车合并。

1)封装接口
//src/apis/cart.js
// 合并购物车
export const mergeCartAPI=(data)=>{
  return request({
    url:'/member/cart/merge',
    method:'POST',
    data
  })
}
2)合并购物车

有“AI”的1024 = 2048,欢迎大家加入2048 AI社区
更多推荐


 24
24 0
0- 0


 已为社区贡献1条内容

所有评论(0)