不看后悔系列之一篇搞懂LinuxCentOS搭建MQTT服务器及客户端操作使用
看完绝对让你直呼通透!花了将近一天的时间,吐血总结~
🎈个人公众号:🎈 :✨✨ 可为编程 ✨✨ 🍟🍟
🔑个人信条:🔑 知足知不足 有为有不为 为与不为皆为可为🌵
🍉本篇简介:🍉 本片详细说明了LinuxCentOS搭建MQTT服务器及客户端操作使用和注意要点,并给出具体操作实例,如有出入还望指正。关注公众号【可为编程】回复【面试】领取2023年最新面试题!!!
全网最全linux CentOS上搭建MQTT服务器,看了之后睡觉香香,身体棒棒!
摘要:
linux CentOS上搭建MQTT服务器并不难,主要就是用到了mosquitto这款消息代理服务软件。其采用发布/订阅模式传输机制,轻量、简单、开放并易于实现,被广泛应用于物联网之中。
MQTT是基于客户端-服务器的消息发布/订阅传输协议,在IoT的应用上比较广泛,主要有几个特点:
 1. 使用发布/订阅的传输模式,实现1对多的发布与接收,减少应用之间耦合度
 2. 能够对负载内容屏蔽传输。
 3. 支持订阅、发布不同账号,实现读写权限分离,确保数据发布安全
 4. 通过TCP/IP提供网络连接,实现方便,支持安全策略控制
 5. 协议头部长度短,网络传输开销小,节约流量
 6. 支持三种消息质量模式:
 7. 最多一次,只发送一次消息,不关注消息是否接受成功
 8. 至少一次,保证消息一定到达,单会有重复
 9. 只有一次,保证消息只有一次到达
 10. 通过last will和testament等特性通知客户端异常中断
我的linux版本为CentOS Linux release 7.9.2009 (Core)
一、安装软件
1.1 输入以下指令
yum install gcc-c++
yum install cmake
yum install openssl-devel
1.2、新建文件
新建个software文件夹,下载mosquitto,下个不高不低的版本,并解压:
mkdir software
cd software
wget http://mosquitto.org/files/source/mosquitto-1.4.10.tar.gz
tar -xzvf mosquitto-1.4.10.tar.gz
但这里还不能编译安装mosquitto
下面的三款扩展性软件,不安装也不影响mosquitto的使用:
1.4、安装c-areas(支持异步DNS查找的库)
wget http://c-ares.haxx.se/download/c-ares-1.10.0.tar.gz
tar xvf c-ares-1.10.0.tar.gz
cd c-ares-1.10.0
./configure
make
sudo make install
1.5、安装lib-uuid(支持为每个连接客户端生成唯一uuid)
yum install libuuid-devel
1.6、安装libwebsockets(支持需使用websocket的应用)
wget https://github.com/warmcat/libwebsockets/archive/v1.3-chrome37-firefox30.tar.gz
tar zxvf v1.3-chrome37-firefox30.tar.gz
cd libwebsockets-1.3-chrome37-firefox30
mkdir build
cd build
cmake .. -DLIB_SUFFIX=64
make install
但是我在执行cmake … -DLIB_SUFFIX=64的时候报了一个错误:
CMake Error: The source directory "*" does not appear to contain CMakeLists.txt.
如果想解决看这篇文章:解决CMake Error: The source directory “*” does not appear to contain CMakeLists.txt.
上面这个问题不处理也没事,并无大碍,只不过没有相应的功能。
1.7、修改mosquitto的配置
我们修改一下mosquitto的配置:
cd mosquitto-1.4.10
vim config.mk
将里面的WITH_SRV:=yes和WITH_UUID:=yes都用#号注释掉
1.8、安装mosquitto
接下来编译安装mosquitto:
make
sudo make install
注意: 如果在后续使用过程中找不到libmosquitto.so.1的话,在software下输入以下指令修改一下libmosquitto.so的位置:
sudo ln -s /usr/local/lib/libmosquitto.so.1 /usr/lib/libmosquitto.so.1
sudo ldconfig
二、安全配置
2.1、创建用户
sudo groupadd mosquitto
sudo useradd -g mosquitto mosquitto
2.2、程序配置
创建配置文件
mv /etc/mosquitto/mosquitto.conf.example /etc/mosquitto/mosquitto.conf
2.3、修改默认配置
1.关闭匿名用户登录
打开mosquitto.conf文件( /etc/mosquitto/mosquitto.conf ),找到allow_anonymous节点,这个节点作用是,是否开启匿名用户登录。去掉前面的#,改为false。
2.设置用户密码文件路径
找到password_file节点,这个节点是告诉服务器你要配置的用户将存放在哪里。打开此配置并指定pwfile.example文件路径(注意是绝对路径),在669行左右。
password_file /etc/mosquitto/pwfile 或者 /pwfile.example
3.配置topic和用户
acl_file /etc/mosquitto/aclfile.example
4.添加用户信息
终端输入,最后面的是用户名,之后自动弹出密码和确认密码,输入即可。(注意第二次创建用户时不用加 -c 如果加 -c 会把第一次创建的用户覆盖。)
mosquitto_passwd -c /etc/mosquitto/pwfile admin203
然后进入到/etc/mosquitto/mosquitto.conf 将下面两个用户名和密码加上。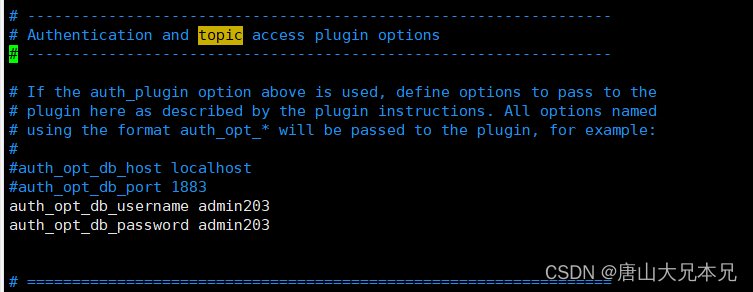
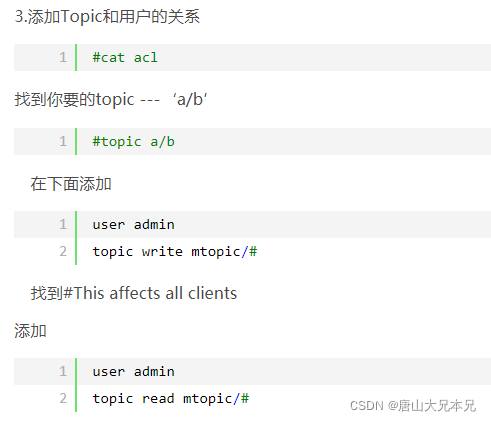
5.添加Topic和用户的关系
vim /etc/mosquitto/aclfile.example
1、如果要配置多个用户可以这样: 配置topic(话题)和用户 acl_file /etc/mosquitto/aclfile
保存退出,返回命令行 重建mqtt账号cpsmqtt,用于读写分离 mosquitto_passwd -c /etc/mosquitto/pwfile cpsmqtt
输入密码 Cps123.2、重建mqtt账号cpsread,用于读写分离,注意第二次创建用户时不用加 -c 如果加 -c 会把第一次创建的用户覆盖。
mosquitto_passwd /etc/mosquitto/pwfile cpsread
输入密码 Cpsread123.
vim /etc/mosquitto/aclfile.example
屏蔽无用的,新增
user cpsmqtt
topic write cps/#
user cpsread
topic read cps/#
继续重启mosquitto -c /etc/mosquitto/mosquitto.conf -d
如果不通的话就可以直接设置这样
# This affects access control for clients with no username.
#user admin203
#topic read mtopic/#
#topic write mtopic/#
# This only affects clients with username "roger".
#user admin203
#topic write mtopic/#
#topic read mtopic/#
# This affects all clients.
#pattern write $SYS/broker/connection/%c/state
user admin203
topic read mtopic/#
topic write mtopic/#
这里一定要设置好,不然就一直抛**Connection Refused: not authorised.**异常。
6、设置用户名和密码
关闭匿名用户登录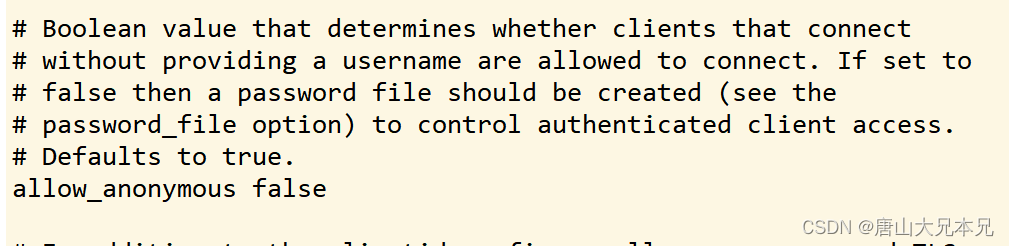
配置账户密码
7、用户认证测试
mosquitto -c /etc/mosquitto/mosquitto.conf
1638589039: mosquitto version 1.4.10 (build date 2021-12-04 09:32:52+0800) starting
1638589039: Config loaded from /etc/mosquitto/mosquitto.conf.
1638589039: Opening ipv4 listen socket on port 1883.
1638589039: Opening ipv6 listen socket on port 1883
启动程序:默认端口为1883
mosquitto -c /etc/mosquitto/mosquitto.conf -d
再开一个(发布)窗口输入:
生产者:
mosquitto_pub -h localhost -t mtopic -u admin203 -P admin203 -m "hello,word,nihao" -p 1883
或者
mosquitto_pub -h localhost -t mtopic -u admin203 -P admin203 -m "test"
另外打开一个服务器窗口,在一个(订阅)窗口输入:
消费者:
mosquitto_sub -h localhost -t mtopic -u admin203 -P admin203
test
hello,word,nihao

三、错误解决
3.1、libmosquitto.so.1 No such file or directory
./mosquitto_sub: error while loading shared libraries: libmosquitto.so.1: cannot open shared object file: No such file or directory
解决办法:
编译完mosquitto之后,进入到lib目录下,将编译之后的libmosquitto.so.1 拷贝到目录/usr/local/lib下,执行如下命令:
cp libmosquitto.so.1 /usr/local/lib
然后再执行:
执行命令:
sudo ln -s /usr/local/lib/libmosquitto.so.1 /usr/lib/libmosquitto.so.1
最后执行
ldconfig
即可
四、MQTTX客户端收发消息
1.下载客户端软件安装包,点击安装包直接安装 MQTTX
2.界面一开始是英文,可以显示中文
3.创建连接,这两个地方都可以创建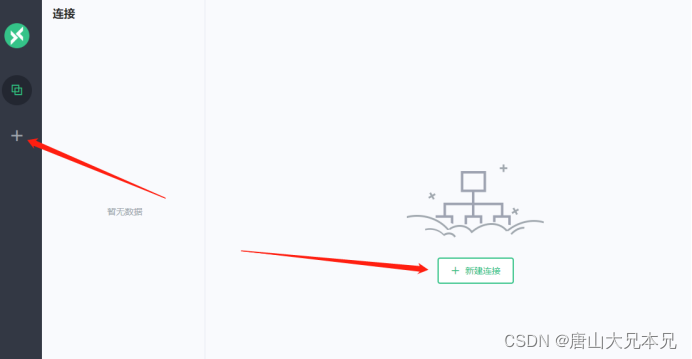
4.主要填写名称,Client ID,服务器地址这三项,连接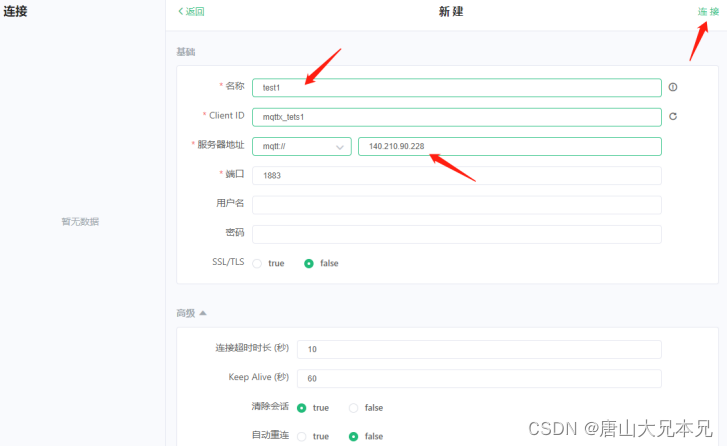
5.同样的步骤,创建一个test2连接
6.在test1中添加一个订阅
7.在test2中输入test1订阅主题的名称,输入内容发送,test1可以接收 一定要注意写Topic的位置。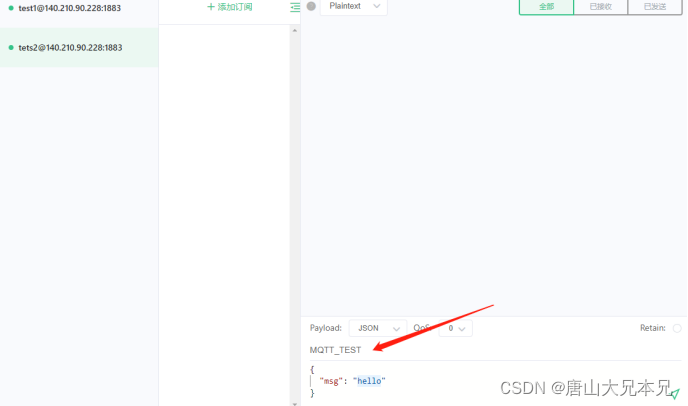

发布
接收
反之,test1也可以给test2发布消息。
到这里MQTT就全部弄完了,可以开心的玩耍了,是不是SoEasy~
欢迎感兴趣的小伙伴一起探讨学习知识,以上是个人的一些总结分享,如有错误的地方望各位留言指出,十分感谢。
觉得有用的话别忘点赞、收藏、关注,手留余香! 😗 😗 😗
这里是一个真诚的***青年技术交流QQ群:761374713***,不管你是大学生、社畜、想学习变成的其他人员,欢迎大家加入我们,一起成长,一起进步,真诚的欢迎你,不管是技术,还是人生,还是学习方法。有道无术,术亦可求,有术无道,止于术。

欢迎大家关注【可为编程】,成长,进步,编程,技术、掌握更多知识!


有“AI”的1024 = 2048,欢迎大家加入2048 AI社区
更多推荐
 5
5 0
0- 0


 已为社区贡献7条内容

所有评论(0)