vscode内网环境部署
6.5打开vscode 选择 File --> Preferences --> settings 在搜索栏中中输入 ssh remote path,选择你的openssh路径即可。6.1这是因为在window本地没有安装ssh,或者没有配置,打开Windows PowerShell,直接输入ssh,如果没有ssh,就会报以下错误。1.首先需要一台能连网的电脑把需要的插件拷贝到内网电脑,把vscod
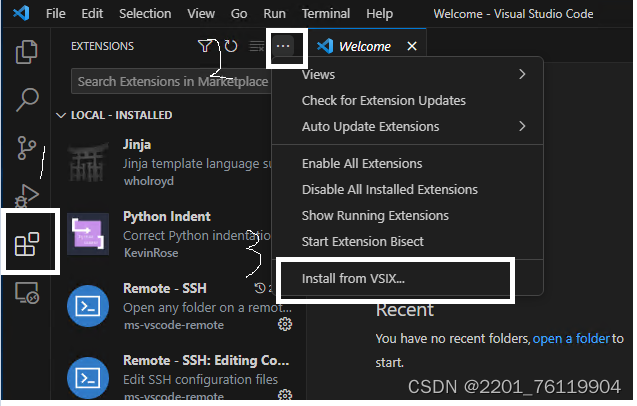
1.首先需要一台能连网的电脑把需要的插件拷贝到内网电脑,把vscode传到内网电脑,在安装时选择环境变量,装完之后重启
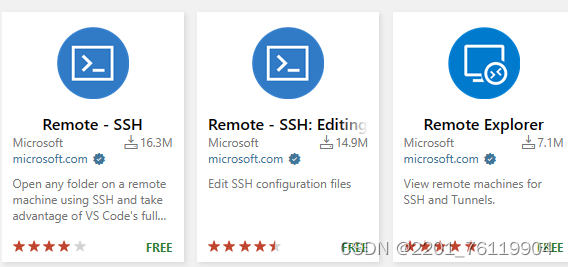
2.安装Remote - SSH 去官网下载,除了下载Remote - SSH之外,还需要下载两个插件
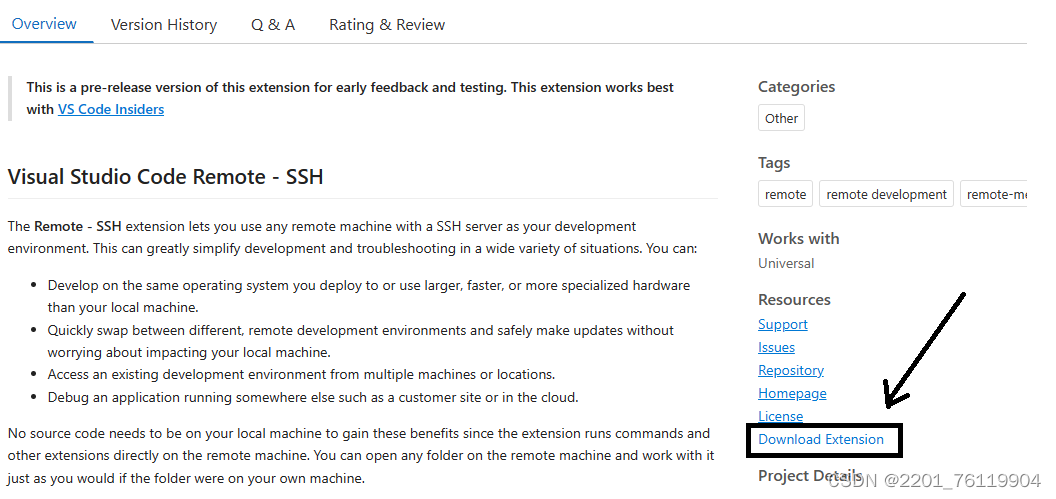
3.选择对应的版本,点击Download Extension下载到桌面,然后在vscode安装
4.如果安装报”Error while fetching extensions. XHR failed“
4.1.点击File --> Preferences --> Seting
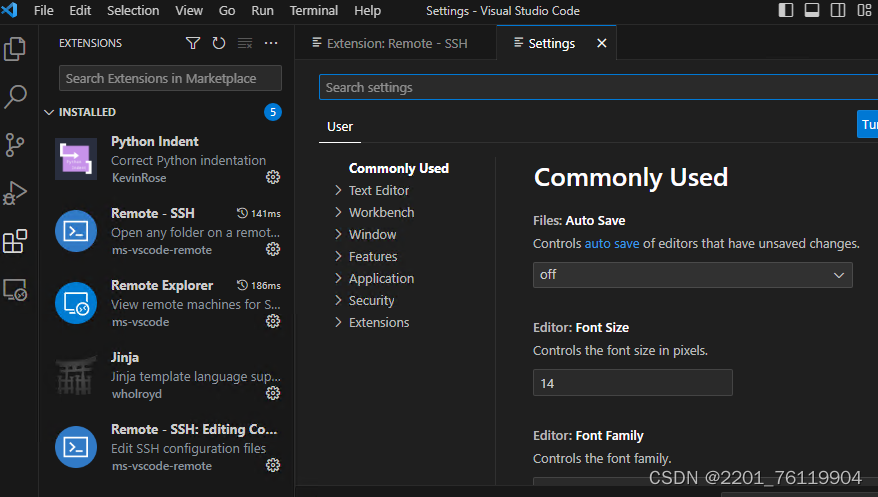
4.2再点击Application --> proxy
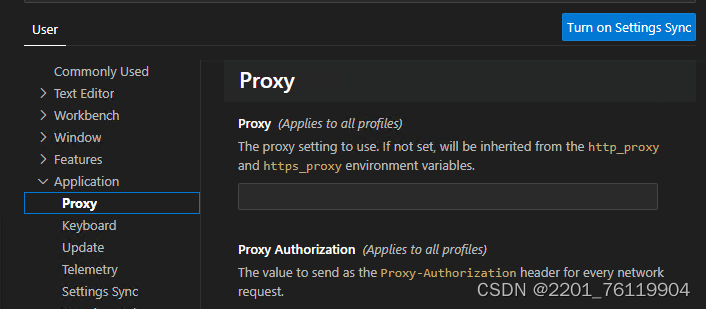
4.3把Proxy中的方框里的内容都给清了,在重启vscode即可
4.4如果方框里没有内容 在以管理员的身份运行cmd
set |findstr http_proxy
set |findstr https_proxy
set |findstr http

set https_proxy=
set http_proxy=
set http=
运行以上命令,如果http_proxyh活https_proxy活http环境有变量,则设置为空
重启vscode即可
5.重启之后就会发现vscode有这个图标了

6.ssh到你的服务器,报an ssh installation couldn't be found
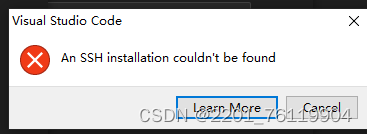
6.1这是因为在window本地没有安装ssh,或者没有配置,打开Windows PowerShell,直接输入ssh,如果没有ssh,就会报以下错误

6.2如果安装了ssh就会有以下的提示

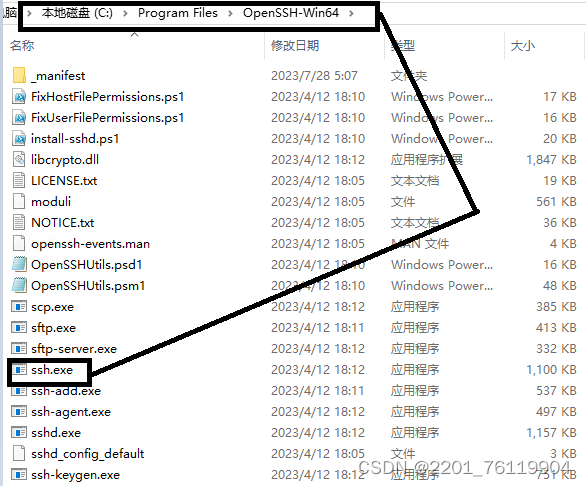
6.3下载openssh,选择对应的版本
Releases · PowerShell/Win32-OpenSSH (github.com) https://github.com/PowerShell/Win32-OpenSSH/releases
6.4把openssh下载到 放到C盘的C:\Program Files\OpenSSH-Win64\ssh.exe
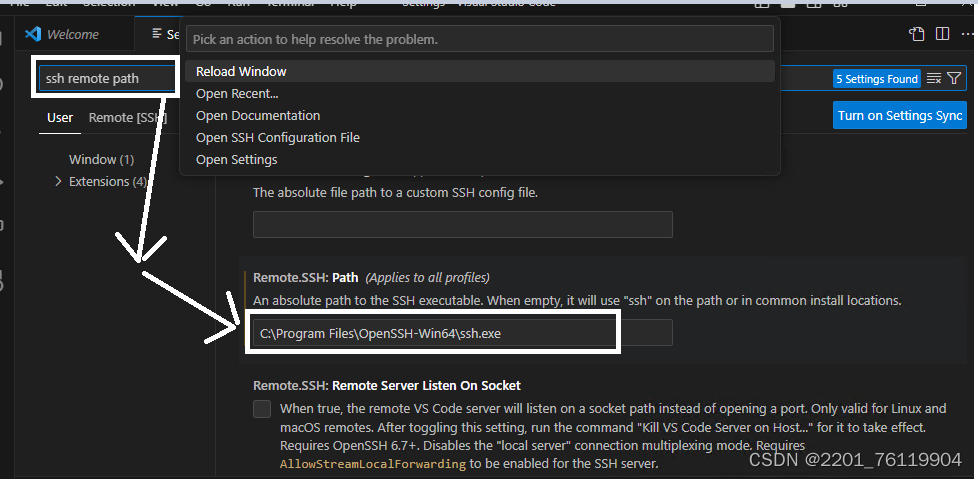
6.5打开vscode 选择 File --> Preferences --> settings 在搜索栏中中输入 ssh remote path,选择你的openssh路径即可
7.输入ssh连接服务器发现报 Could not establish connection to "IP":XHR failed
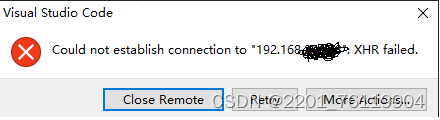
7.1这是因为服务器上没有部署vscode server
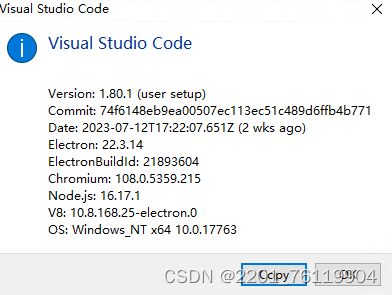
7.1找到内网vscode的help --> about 查看vscode的commit号,在用命令下载到服务器上
 curl -sSL "https://update.code.visualstudio.com/commit:74f6148eb9ea00507ec113ec51c489d6ffb4b771/server-linux-x64/stable" -o vscode-server-linux-x64.tar.gz


mkdir -p ~/.vscode-server/bin/74f6148eb9ea00507ec113ec51c489d6ffb4b771

tar -zxvf vscode-server-linux-x64.tar.gz -C .vscode-server/bin/74f6148eb9ea00507ec113ec51c489d6ffb4b771/ --strip 1
8.重启vscode,重连即可
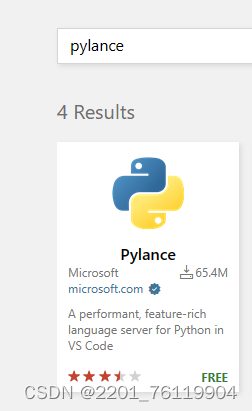
9.设置python模块代码提示,只需要下载pylance即可
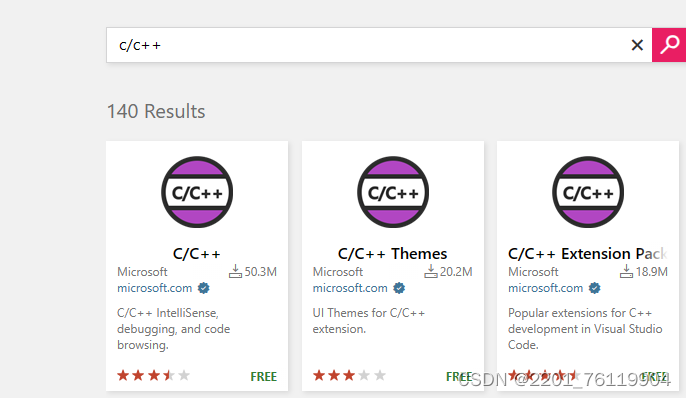
10.在vscode中编写c/c++
10.1首先在vscode中安装c/c++插件
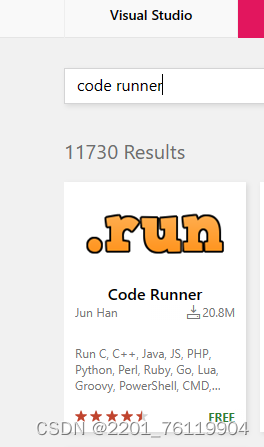
10.2.code runner插件,用于编译
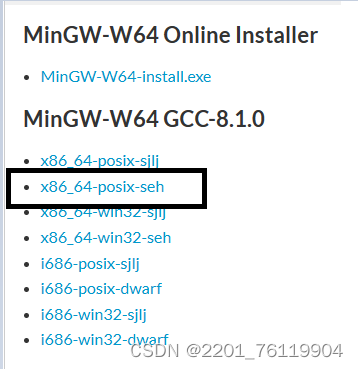
10.3下载minGW64 MinGW-w64 - for 32 and 64 bit Windows - Browse Files at SourceForge.nethttps://sourceforge.net/projects/mingw-w64/files/
如果是win10 64位下载这个
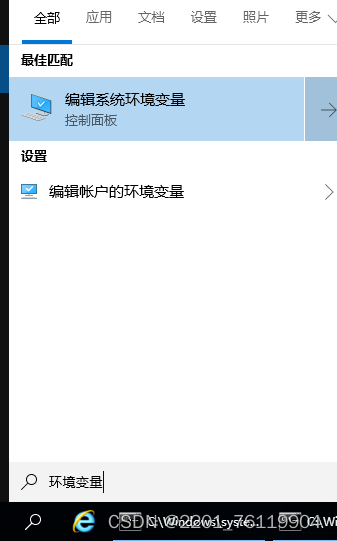
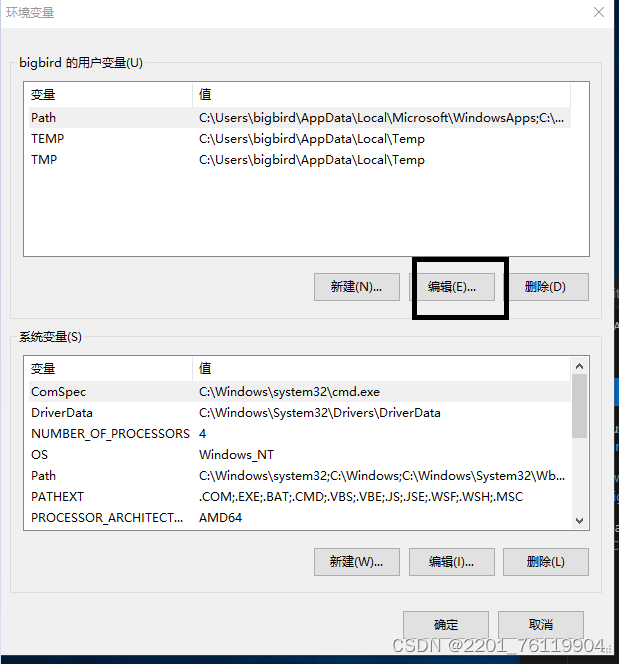
10.4设置环境变量,在win搜索栏中搜索环境变量
10.5找到环境变量
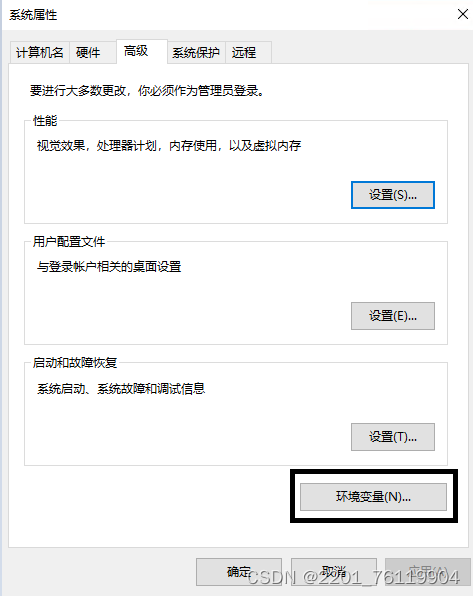
点击编辑
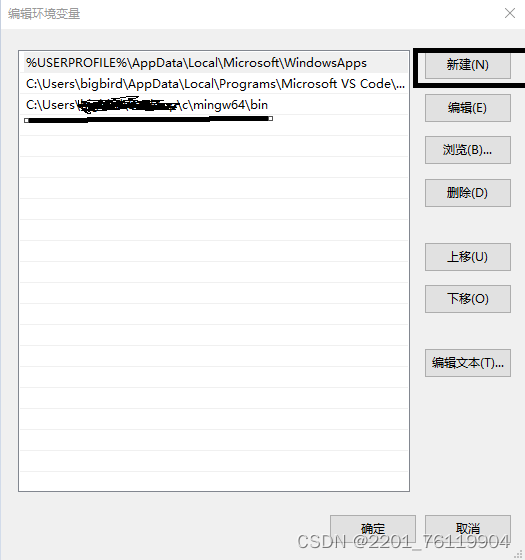
点击新建添加你minGW64中的bin
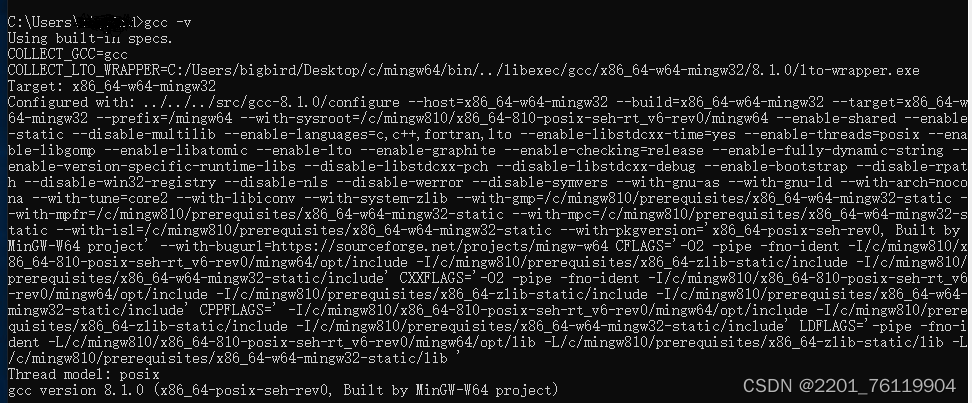
检查是否成功 在cmd中输入gcc -v
11.如果需要在服务器里面运行,需要在服务器上安装,可以直接用gdb
yum install gdb -y点击debug调试

点击创建launch.json文件,内容如下
{
    "version": "0.2.0",
    "configurations": [
        {
            // 工程项目名称
            "name": "test1",
            "type": "cppdbg",
            "request": "launch",
            // gdb启动调试的目标生成文件
            "program": "${workspaceFolder}/test1",
            // 目标文件启动参数
            "args": [],
            "stopAtEntry": false,
            // 当前工作路径
            "cwd": "${workspaceFolder}",
            "environment": [],
            "externalConsole": false,
            "MIMode": "gdb",
            "setupCommands": [
                {
                    "description": "Enable pretty-printing for gdb",
                    "text": "-enable-pretty-printing",
                    "ignoreFailures": true
                }
            ],
            // launch启动调试前依赖的 tasks.json 中的task配置,一般是用于调试前的代码编译
            "preLaunchTask": "build-project"
        }
    ]
}
tasks.json
{
    "version": "2.0.0",
    "tasks": [
        {
            // task名称,对应launch.json里面 preLaunchTask 配置
            "label": "build-project",
            "type": "shell",
            // 编译命令(如果使用make、cmake等等编译方式编译,则设为相应的命令)
            "command": "g++",
            // 编译参数
            "args": [
                "-std=c++11",
                "-g",
                "main.cpp",//这个换成当前编译的名字
                "-pthread",
                "-o",
                "test1"
            ]
        }
    ]
}
12.如果插件需要在服务器里面部署,运行
.vscode-server/bin/74f6148eb9ea00507ec113ec51c489d6ffb4b771/bin/code-server --install-extension /root/vscode/ms-python.python-2023.13.12001005.vsix
有“AI”的1024 = 2048,欢迎大家加入2048 AI社区
更多推荐


 1
1 0
0- 0


 已为社区贡献1条内容

所有评论(0)